2013年9月16日 星期一

10 Free Photo Gallery Extensions for Joomla

Joomla is one of the most popular Content Management Systems (CMS) in the world, used in over 30 million sites, with over 200,000 community users and endless amounts of extensions. There are extensions for almost every purpose: social networking, advanced comment services, checkout services, easy-to-setup photo albums, the list is endless.

This time we will show you the top 10 free Joomla extensions you could use in case you’re looking to add a photo gallery to your Joomla project, they will surely help you take your Joomla website to the next level. The biggest advantage is that by using the following simple solutions you can easily add awesome image galleries for your Joomla-powered website without any hassle at all, plus totally for free. Yet note that all these extensions, except for Ignite Gallery, are for non-commercial use, so you may want to pay attention to the respective license terms.

1.     Hi Slider Free Photo Gallery Extensions for joomla


What is Hi Slider Free Photo Gallery Extensions for Joomla?

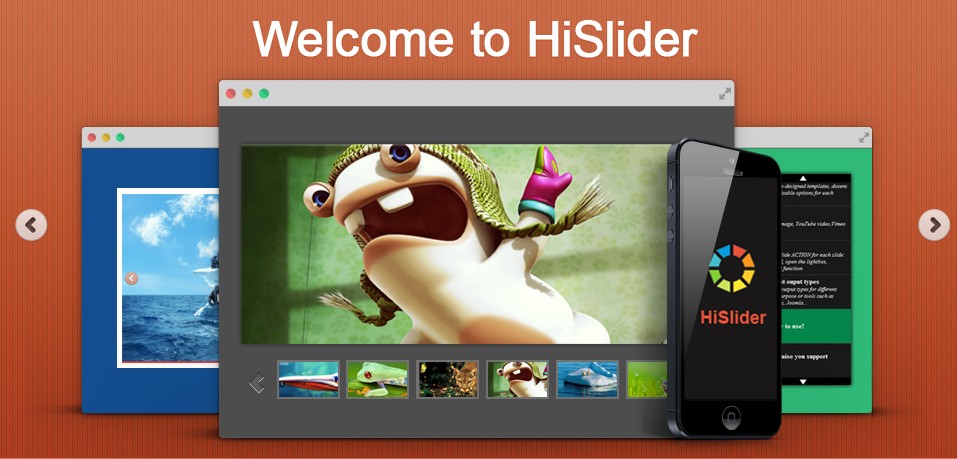
Hi Slider Free Photo Gallery Extensions for Joomla is widely used photo gallery creator designed by Hi Slider Company. It is total free, easy to use and allows different methods of display image & video details such as 3DHorizontal, Base, Blind, Fade, Rotate, Radom and more. It also enables you to display your Image, video with title and description and it has 10+ ready-for-use templates, themes that you can easily change to spice up your gallery’s appearance. Flexible methods of publish ways are also available such as Basic Version (HTML), WordPress plug-in, Joomla Module, Drupal Module. So far Hi Slider Free Photo Gallery is the most beautiful photo gallery implementation in the world.

Download Hi Slider  | View Demo


Key Feature of Hi Slider Free Photo Gallery Extensions for Joomla?


1.     Total free software for create Joomla Photo Gallery;
2.     Very Easy to use with clear interface;
3.     Powerful Import engine, support mainly image format, YouTube Video, Vimeo Video and even Local Video;
4.     20+ SlideShow Effect to catch reader eyes;
5.     Lots of ready-for-use template and themes;
6.     Fully photo gallery settings;
7.     Hyperlink, JavaScript Function inserted;
8.     Shows on Full Screen for Each Image;
9.     Special Ken Burns Zooming Effect;
10.  Preloader settings;
11.  Fully Responsive for website;
12.  All Kinds of Mobile Devices Support;
13.  Multiple Browsers Support;
14.  Create Multiple Albums.
 ... ...

How to create stunning Photo Gallery with Hi Slider step by step?

If you want to create a stunning Photo Gallery for catching reader eyes, you may view below and have a try with Hi Sliders. It is very easy-to use software, just several steps you can create Photo slider album. Now, let check it how to create attractive Photo Gallery with Hi Slider step by step.

Step1: Login Hislider.com, download Hislider software and install in your computer (Easy ha…)


Step2: Open Hislider, and click “Create New” button to start new project.

You can add image, video files, and add basic info for each slider, define slider transition effect and Action Info. You can also do some simple settings like set slider width and heigh, and define slider fill mode.

Step3: Slider Design
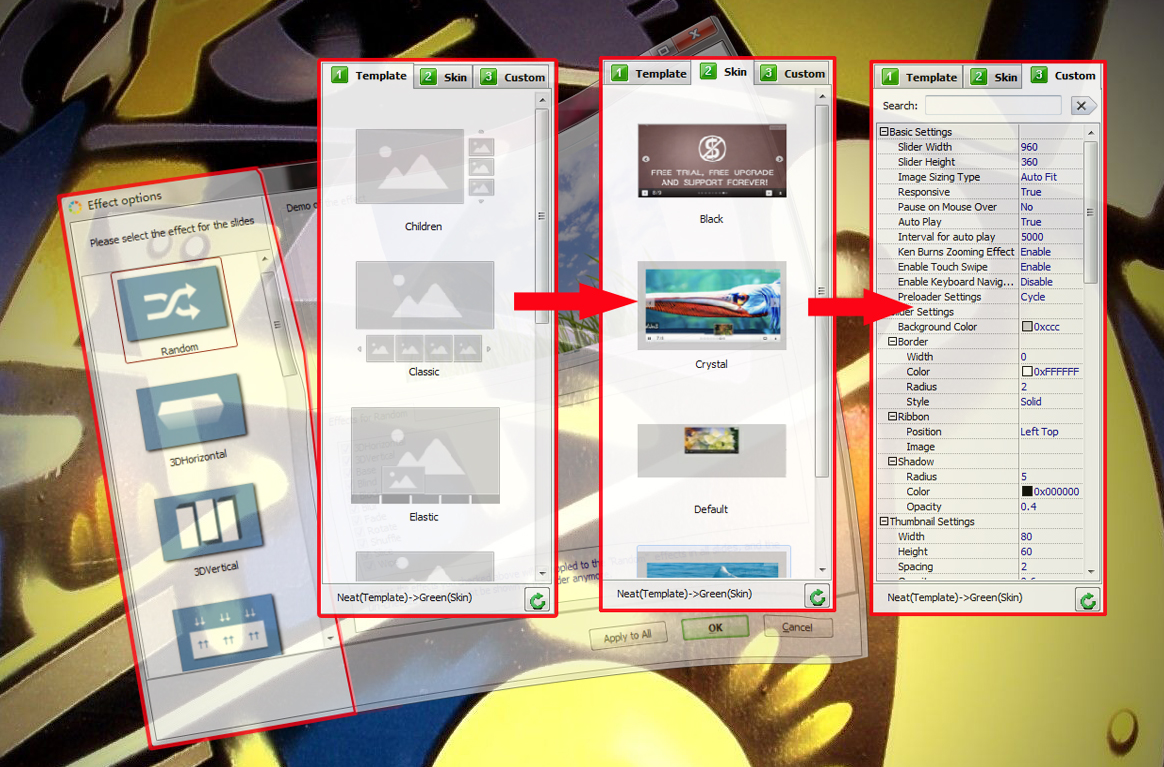
Choose Template
Choose Skin
Fully Custom settings

Step4: Publish the slider. There 4 methods: Basic Version, WordPress Plugin, Joomla module and Drupal module


YouTube Tutorial


2. Ozio Gallery


3. Simple Image Gallery


4. JoomGallery


5. Ignite Gallery


6. Hoverbox


7. PhotoMap Gallery


8. Facebook Gallery


9. Phoca Gallery


10. Joomla: CSS GALLERY


2011年12月19日 星期一

Want reader to know more about you and your products?

Learn more: www.flippdf.com


Are you presenting your products or ideas though a flash flipping catalog or presentation booklet? In the flip book, you have to describe your idea and tell reader what’s the advantage of it, but if you put your phone number and address in it, the impressions may be broken. Well then how to let them know more about me and make contact? Why not try the about button? You can add an “about” button to the toolbar, when readers click it, it will tell them your information that you want to tell them.


Step1: set “tool bars settings-> buttons bar-> about button-> about button visible-> show”;


Step2: click “…” of the “content” option to popup a setting window, enter your information in the blank; or click “load” to load from a text file.


Setp3: apply change, then you can see an about button at the toolbar, click it and you will see below.


Free download Flip PDF

Free download Flip PDF Professional

Free download Flip PDF for Android

customize the toolbar icon of your own style

Learn for more: www.flippdf.com


I’m going to create a flash flip book of myself, and everything is good but one thing, it will be better if I can change the toolbar icon color. And further, that will be really great if I can even change the icon itself. So is this possible and how can I do it?
Of course you can change the color of the icons, and the toolbar icons, yes; you can change them either if you have some SWF files to use as icons.

First to find an option called “Button Icons”. You can find “Icon color” and “Icons file (SWF only)” under this option. Click “…” button of “icon color” to change color; click “…” button of “icons file” to choose SWF files from your computer.


Free download Flip PDF

Free download Flip PDF Professional

Free download Flip PDF for Android

Free download Flip PDF for Mac OS X (Lion)

Free download Flip PDF Professional for Mac OS X

add my own watermarks to the flash catalog

Learn more: www.flashbookmaker.com


Are you presenting your products to your clients with a flash catalog? A unique and outstanding watermark plays an important role in giving clients a strong impression. So you may need to add a special watermark to the flipping pages. Though PDF to FlashBook attach a set of watermarks, but maybe you want to add your mark or your company’s logo so clients can easily remember. But how? Let’s check it out.

Click “set watermark” under “Add File” tab to pop up the watermark configuration window.
Then click “add new watermark” button, choose watermark type according to your mark’s format. Five types of watermarks are available like below. Then click OK and import your catalog, you will see the watermark was added to pages.

*Please be aware that you have to click “Apply Changes” to apply any changes to the flash book.

save the current project for future importing

Learn more: www.flashbookmaker.com


This is a basic feature of any editing software, so of course, PDF to FlashBook could do this. While you are dealing with a big project, you can’t finish it in one time, you’re able to save this project and import it to continue.

Save: Click “File”, choose “save project as…” then choose a folder for the project, then name it and save.
Import: Click “File->Open project” then find the folder you saved a project, open it and double click the project, PDF to FlashBook will import it automatically.

*Please be aware that you have to click “Apply Changes” to apply any changes to the flash book.

slide show photos in your flash book

For more: www.flashbookmaker.com


Here are some questions I want to ask. I’m working on a flash periodical and of course, I have some photos to put in it. And as it’s a flash magazine, I suppose that there should be something different from traditional publications. I’m wondering if there a method that allows me to show as much photos as I can in the smallest space, so that I can save some spaces for other contents.
There is a way to achieve this, not only saving spaces, but also reflects the superiority of flash format publications. You can embed an album in it so that you can show as many as photos you want without worrying about space.

First you have to add a photo as the album cover, click “Edit Pages” button for process, this will open an edit window. This step is the same with adding images to flipping PDFs, check here to learn more.

And secondly, move sight to the right config window, click “Action Options” button, and then check the “Photo Slideshow” option in the popup window.
This will open a photo information window; click “Add Images” to choose image files from your computer.

Click OK after then and save to exit the page editing window; you can click on the album cover to confirm. Use left and right control button to slide photos.


*Please be aware that you have to click “Apply Changes” to apply any changes to the flash book.